Samsung and the A series, an old and beloved story! A series that comes with a new episode every year and always has a lot of fans. This series has always tried to give people good features at a reasonable price and is one of the best-sellers in the market.
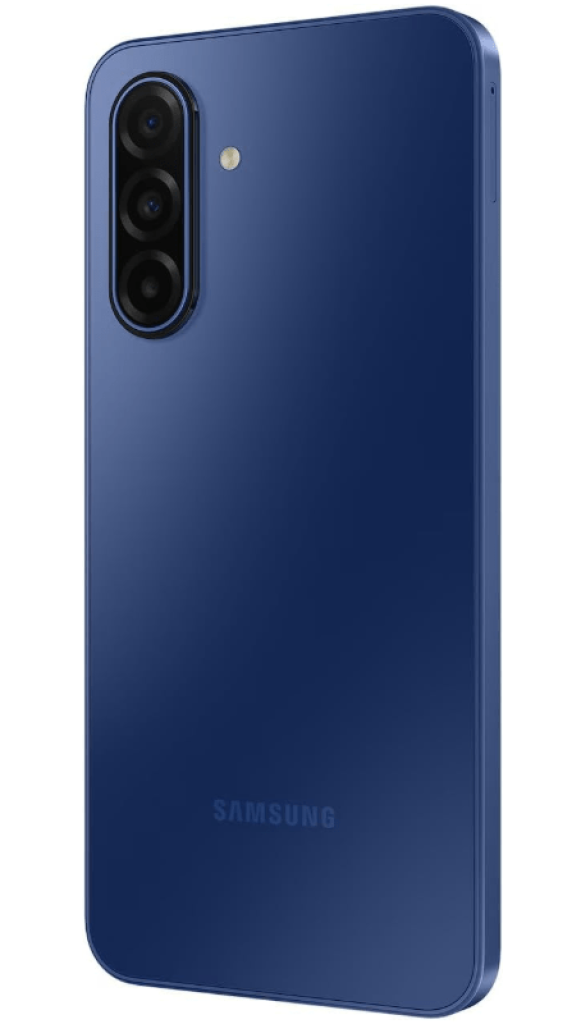
Today we are going to look at the newest member of this family, the Galaxy A17 5G. This phone, which was launched in August 2025, has come to create a stir in the budget and mid-range phone market. Now we want to see what the internal architecture of this new Samsung player is like and how easy it is to repair if there is a problem with its various parts, such as the battery or the screen.
Before we start, we need to remove the SIM card tray. If we take a look at the SIM card and microSD card tray, we will see that there is a yellow rubber gasket around its opening. (Xiaomi’s HyperOS 3 UI Review)
Now we need to heat the back cover with a hair dryer or a heater (heat gun) to loosen the adhesive underneath. Then we can use a pry tool to remove the back cover. I prefer a hair dryer because I’m less likely to damage the internal components with too much heat.
Here’s a better look at the plastic back cover. The glass cover of the camera lens can also be replaced by heating it and gently lifting it up. So you don’t have to open the whole phone to replace it.
Now we have 15 square screws that need to be removed. Once the screws are removed, we need to insert a plastic tool between the back cover and the screen and pull it around until the spines of the frame are free.
Well, if we look at the back cover, it’s made of plastic. We see the flat antenna cables as well as the NFC antenna. Looking at the other side, we see more flat antenna cables around the frame and a layer of graphite to help with heat transfer.(Google Pixel 10 Pro review)
Once the back chassis is removed, we see this flat cable that connects the main board to the subboard and also connects the display cable to the main board. So if you want to change the screen, at this stage you disconnect the battery cable and this cable that connects the display to the main board. Then you carefully disconnect the display cable from the subboard. You heat the front of the phone, that is, on the screen, to loosen the adhesive under it. You remove the old screen, apply new adhesive, attach the new screen and be careful to pass its flat cable through that hole in the middle frame. Then you reassemble the phone.(Samsung S25 FE Disassembly)
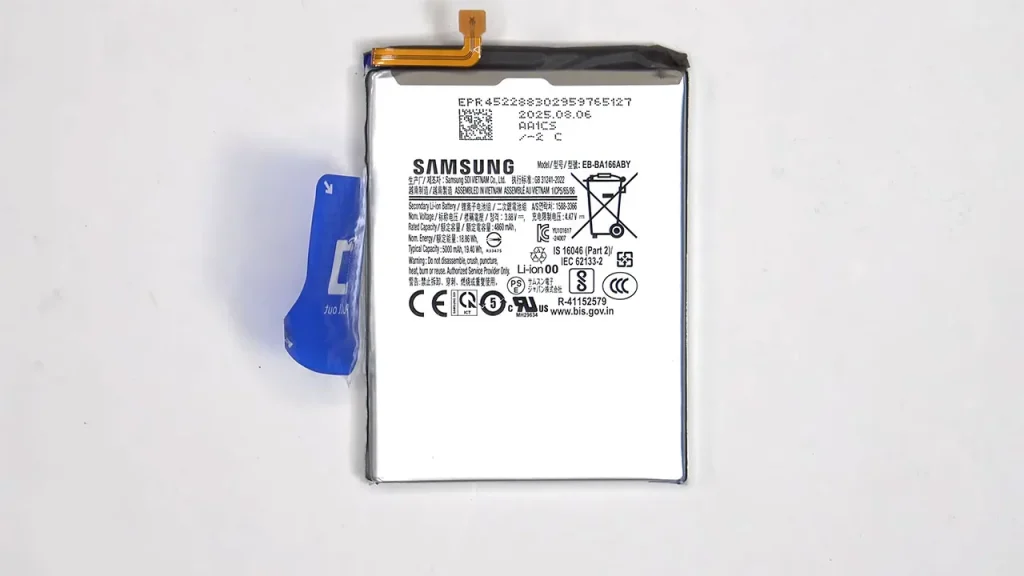
The blue coaxial cable that connects to the subboard and the main board comes off with a little pressure. They also put a tab to help you remove the battery more easily. It’s a 5000 mAh battery.
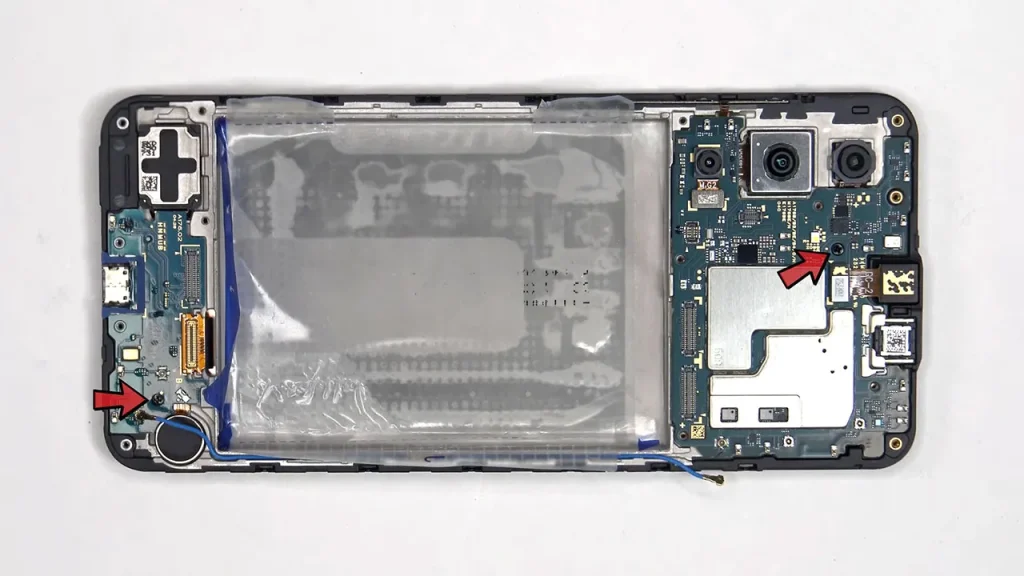
There are two more four-way screws that need to be removed. One holds the main board in place, and the other holds the sub-board.
Looking at the main board, we see the 5MP ultra-wide lens, the 50MP main lens, and the 2MP macro lens. Only the main camera has optical image stabilization (OIS). The LED flash is here, and a secondary microphone is located in the upper corner. The flat cables for the cameras can also be removed with a little pressure.
Looking at the other side of the board, we see the 13MP selfie camera, the front ambient light sensor, the SIM and microSD card slots, and a thermal strip on the back shield. When we remove that, we see the thermal paste on top of the processor. Here’s a better look after we’ve cleaned off the thermal paste.
Now let’s move on to the sub-board; we see a rubber gasket around the charging port, and the main microphones are located here. Here’s a look at the other side. The vibration motor is located in the bottom corner, held in place with some adhesive, as is the bottom speaker. If you want to replace any of these, just apply a little heat and gently pry them apart.
Here’s the volume and power button flex cable. To replace it, just gently pry the flex cable apart. And here’s the top earpiece, also held in place with adhesive. We also have two liquid damage stickers. One here on the frame under the SIM card tray and the other here under the sub-board. There’s also a pad on the frame under the processor, which again helps transfer heat away from the processor.
Now, in the case of this phone, if you accidentally insert your SIM card pin into the wrong hole, you don’t need to worry because both the filters and microphones are above that hole and won’t be damaged.
For repairability, I give this phone a 9 out of 10. The ability to easily remove the battery and not too difficult to replace the display are among the positive features of this teardown of this phone. Now it’s time to put the phone back together. Once everything is back in place, apply new glue and reattach the back cover. Turn the phone over, turn it on, and you’re done.